首先,需要下载部署ueditor相关代码,可以参考一篇简单的博客,这里不再赘述;
环境搭建好后,我们先简单使用一下,启动http://web.yucong.com:8080/ueditor/index.html页面。
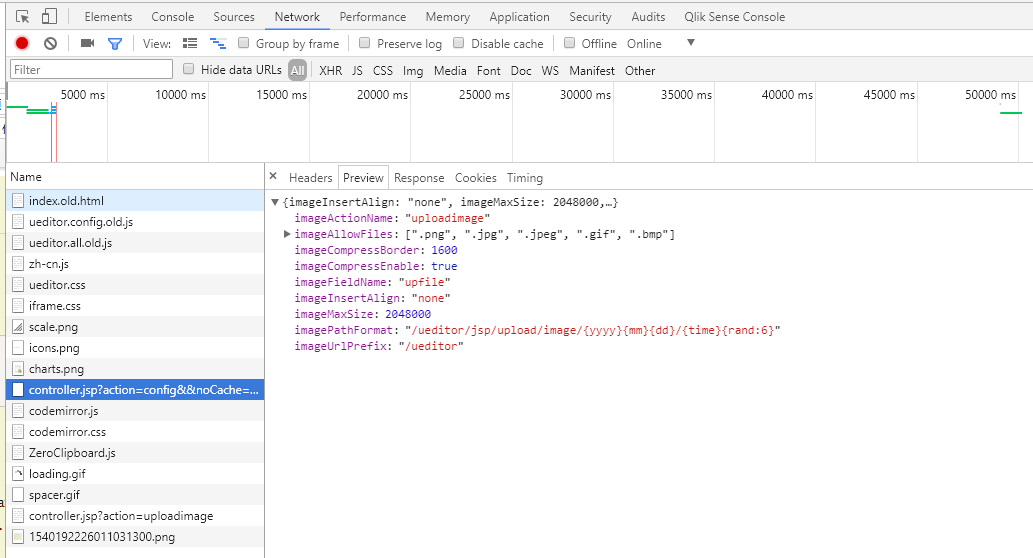
(我这里只讲述单文件跨域请求的解决方案)需要调用获取默认配置的接口和上传单图时需要调用上传图片的接口。
获取默认配置的接口:
上传单图的接口:
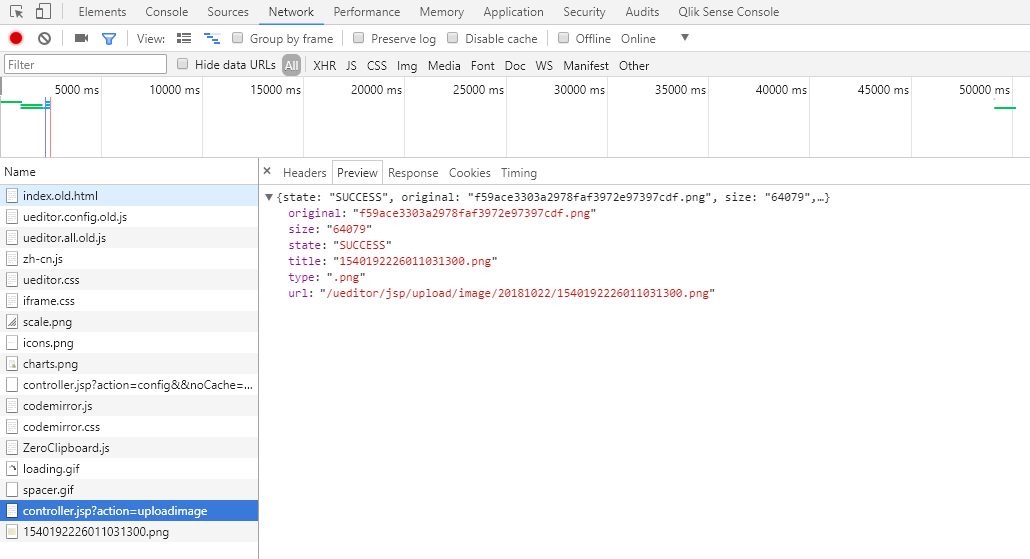
因为我这里是前后端分离的,后端要独立出来,而且使用的是SpringBoot,不再使用JSP接收相关请求了,所以需要修改ueditor的相关默认配置。
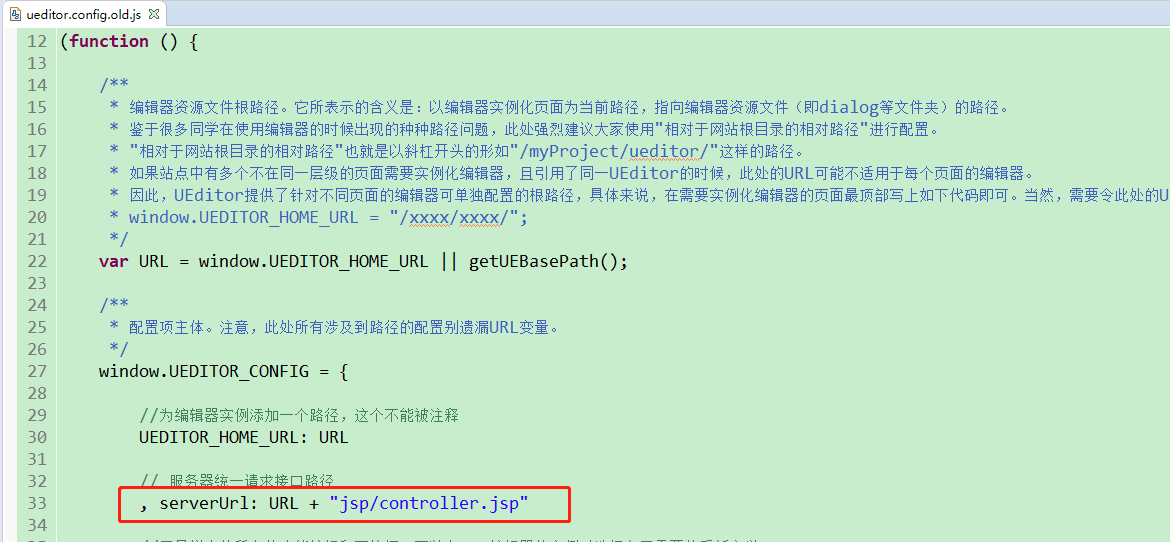
ueditor.config.js中,需要修改serverUrl参数,修改成SpringBoot项目的controller地址:
我这里修改为:http://www.yucong.com:8001/admin/ueditor (www.yucong.com是在本机hosts文件中配置的,admin为项目名称,ueditor为Controller的访问地址)
, serverUrl: "http://www.yucong.com:8001/admin/ueditor/"贴一下我的Controller代码吧:
/** * 图片上传 */@RestController@RequestMapping(value = "ueditor")public class BaduUeditorController {@Autowiredprivate PictureService pictureService;/** * 上传单张图片 */@RequestMapping(value = "uploadimage", method = RequestMethod.POST)public void upload(HttpServletRequest request,HttpServletResponse response) throws IOException {//仅做演示,具体实现代码很简单,这里不作展示,这里会有一个iframe跨域的问题,别急,后面会给出解决方法String result = "{\"state\": \"SUCCESS\",\"original\": \"f59ace3303a2978faf3972e97397cdf.png\",\"size\": \"64079\",\"title\": \"1539934227542006306.png\",\"type\": \".png\",\"url\": \"http://img.i-banmei.com/test/Images/201810/22/aaefd6e3fa7c49a9b6c1e58259deea6120181022172845.jpg\"}";response.setContentType("text/html;");response.getWriter().write(result);}/** * 获取图片上传默认配置 */@RequestMapping(value = "config", method = RequestMethod.GET)public void config(HttpServletRequest request,HttpServletResponse response) throws IOException {//仅做演示,具体实现代码很简单,这里不作展示String result = "{\"imageInsertAlign\":\"none\",\"imageMaxSize\":2048000,\"imageAllowFiles\":[\".png\",\".jpg\",\".jpeg\",\".gif\",\".bmp\"],\"imagePathFormat\":\"/ueditor/jsp/upload/image/{yyyy}{mm}{dd}/{time}{rand:6}\",\"imageActionName\":\"uploadimage\",\"imageCompressEnable\":true,\"imageFieldName\":\"upfile\",\"imageCompressBorder\":1600,\"imageUrlPrefix\":\"/ueditor\"}";response.setContentType("text/html;charset=UTF-8");response.getWriter().write(result);}}在调接口时,UEditor会调一个方法getAction方法获取请求地址,具体看代码:
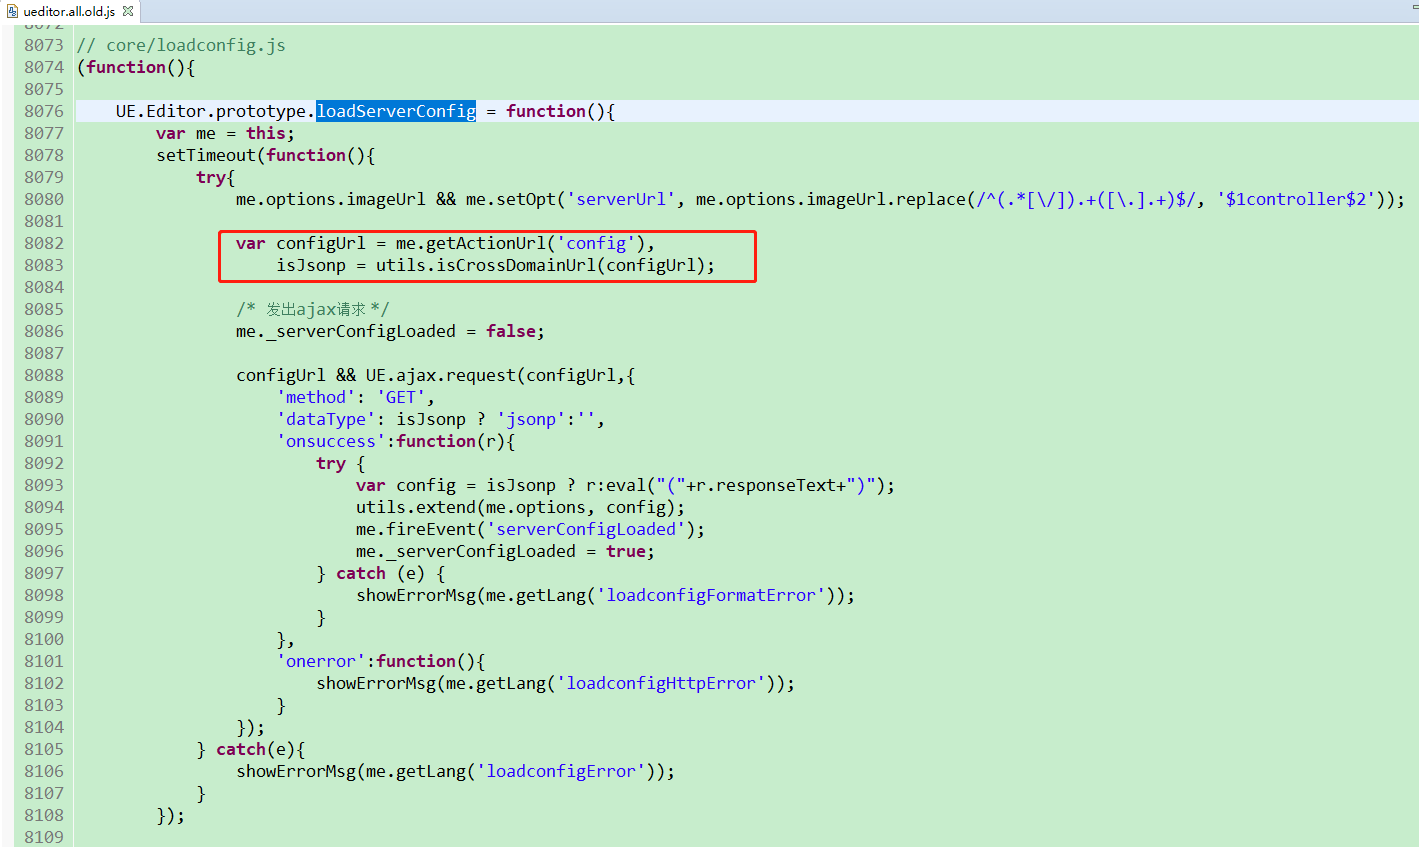
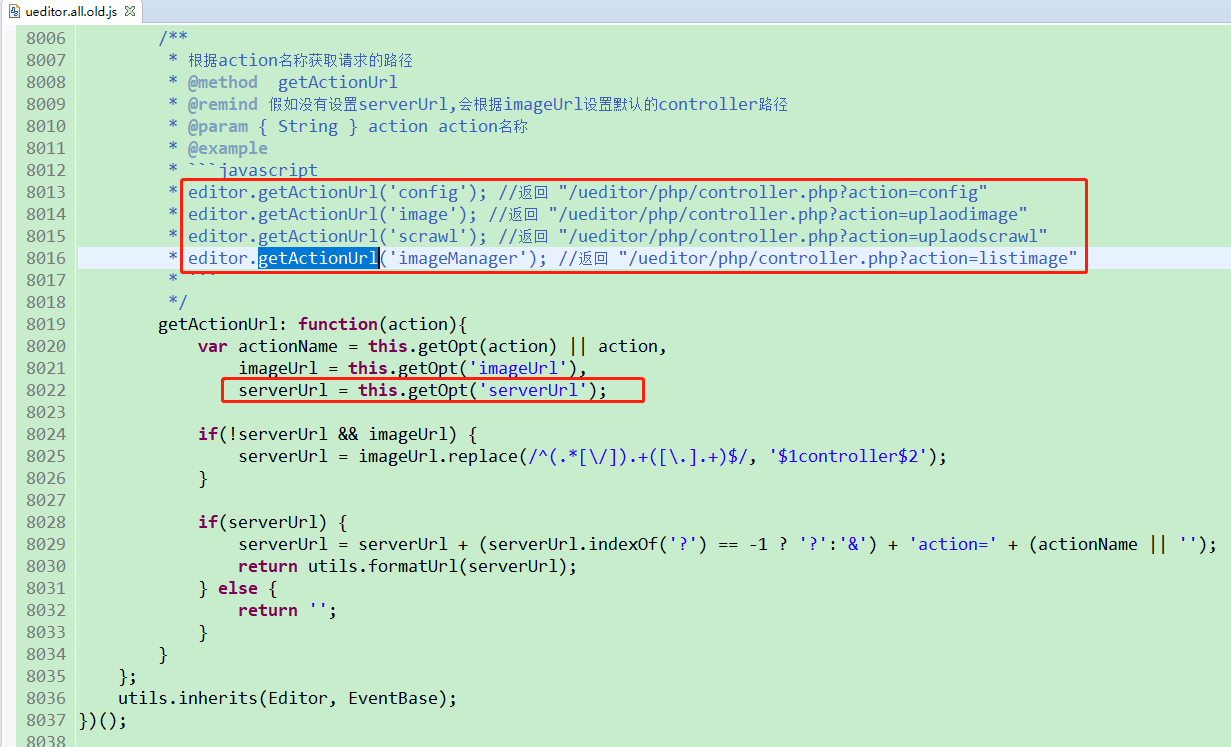
对getActionUrl方法的注释,源码里面说的也很清楚,我修改了8022行代码,用来兼容我的后台系统,毕竟示例代码是jsp实现的,我用springmvc来实现啊:
serverUrl = this.getOpt('serverUrl') + action;注意:在调用http://www.yucong.com:8001/admin/ueditor/config接口时,有个跨域问题,也就是ueditor.all.js的8083行代码中isJsonp为true,使用的是jsonp请求。
给出我的解决方案吧,我直接将 isJsonp = false,使用拦截器让我的后台支持跨域访问,让前端调用时,使用传统非跨域的方式照样能访问。
//isJsonp = utils.isCrossDomainUrl(configUrl);isJsonp = false; //默认都用doAjax请求根据项目的实际情况来,你也可以使用jsonp的方式来实现。
开始上传图片了,发现图片是可以上传了,但是前端页面上没有成功,这个就是跨域问题引起的:
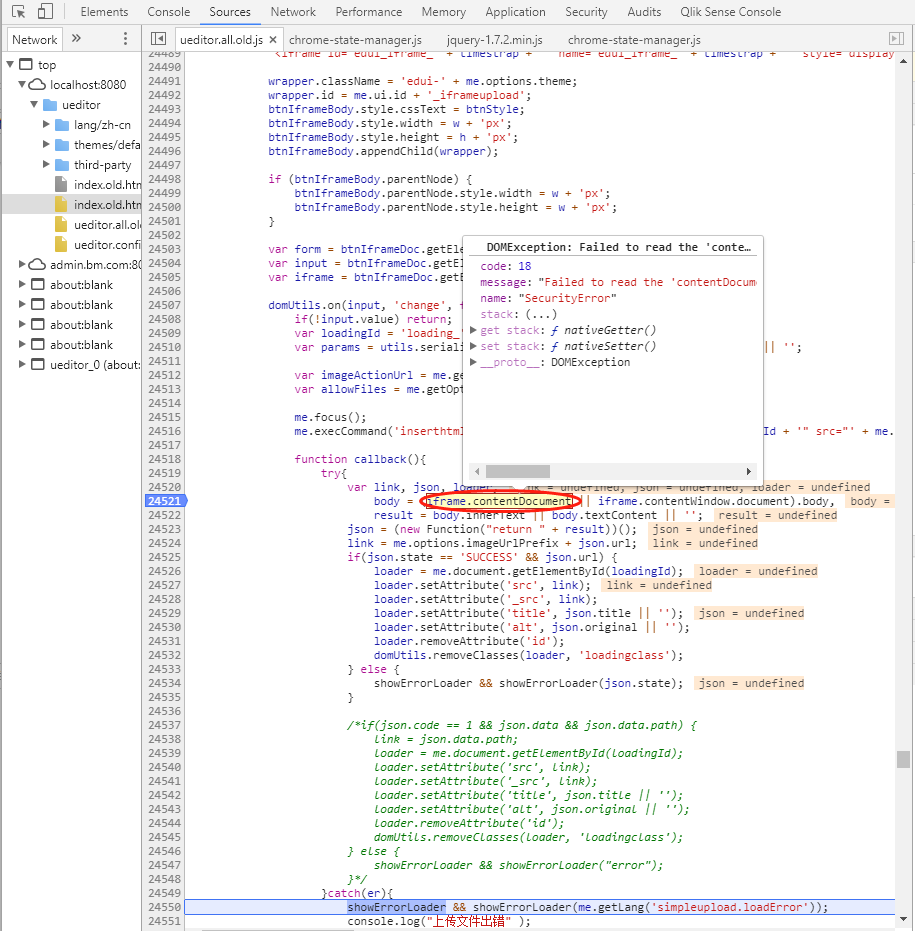
js异常描述为:
code:18message:"Failed to read the 'contentDocument' property from 'HTMLIFrameElement': Blocked a frame with origin "n "http://web.yucong.com:8080" fr" from accessing a cross-origin frame."name:"SecurityError"
上网搜了一下,原因是:
ue的单文件上传是form提交到iframe,然后检测iframe里面的内容来返回结果,官方已经明确说明了单文件上传不能实现跨域上传,就是因为跨域的iframe是获取不到iframe里面的html代码的,所以现在不能获得上传地址。
调试了一下,也确实如此:
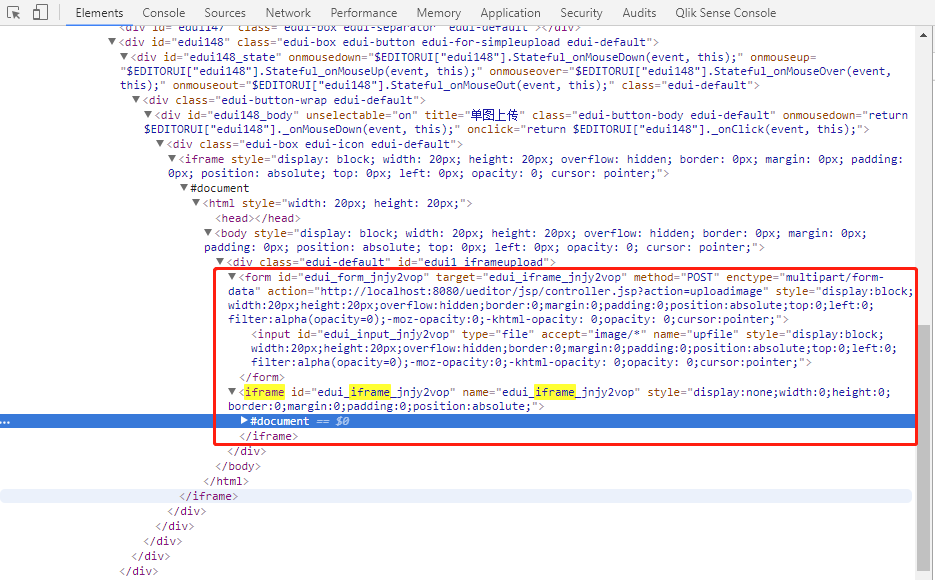
实现单文件跨域上传,首先要搞懂它的原理,它是form表单提交,将提交结果展示到iframe上,然后监控iframe加载完成后js获取iframe里面的内容也就是json结果来得到图片上传结果。
而跨域上传iframe里面的页面和当前页面不是同一个域名就获取不到json了,官方说暂时不支持,其实so easy,用传统的代理页面来解决,就是文件服务器上传成功后,不直接显示结果,
而是跳转到web.yucong.com下面来的reustl.html页面来,把结果传递到这个页面上,再输出来,这样iframe就在同一个域名上了,js就能直接获取iframe里面的内容了。
提交form表单时需要,加一行代码:
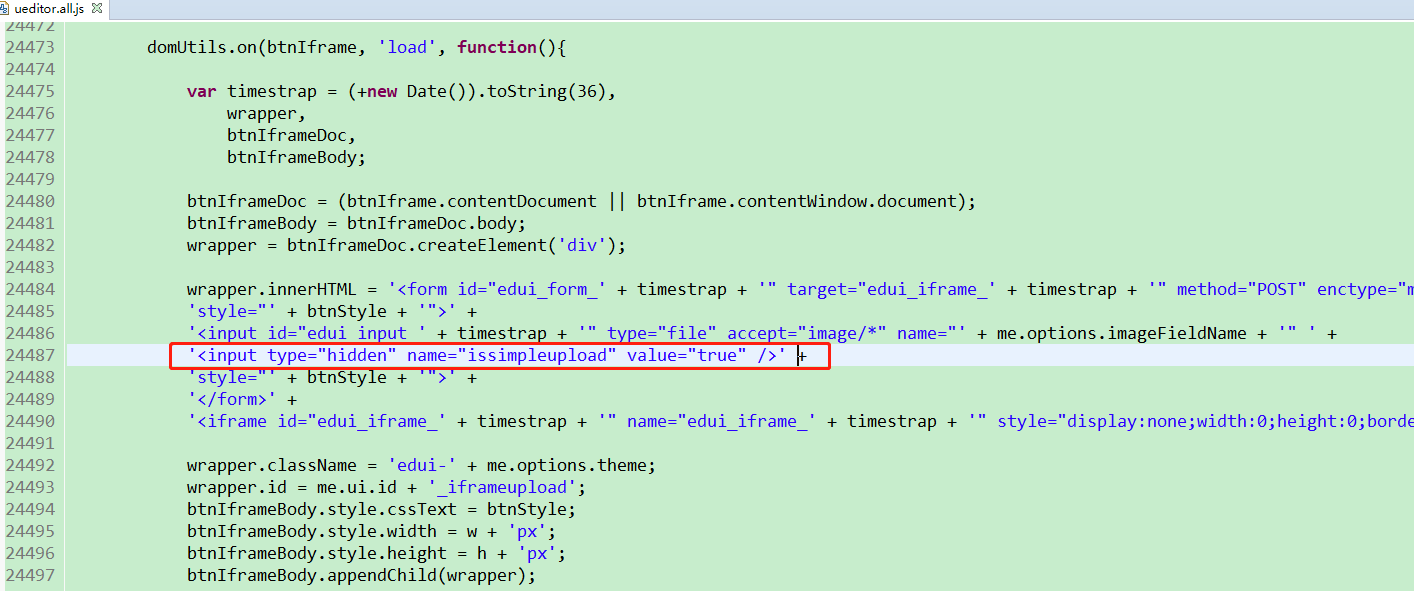
这样,就能识别出是单图时上传了。
再次贴一下后端代码:
/** * 上传单张图片 */@RequestMapping(value = "uploadimage", method = RequestMethod.POST)public void upload(HttpServletRequest request,HttpServletResponse response) throws IOException {//图片上传到阿里云OSS上String picPath = "http://banmei-oss.oss-cn-shanghai.aliyuncs.com/Images/201802/23/812627c218e94990b5bd0be83e48d22c.jpg";String result = "{\"state\": \"SUCCESS\",\"original\": \"f59ace3303a2978faf3972e97397cdf.png\",\"size\": \"64079\",\"title\": \"1539934227542006306.png\",\"type\": \".png\",\"url\": " + picPath + "}";if("true".equals(request.getParameter("issimpleupload")) {response.sendRedirect("http://web.yucong.com:8080/ueditor/result.html?state=SUCCESS&url=" + picPath ); }response.setContentType("text/html;charset=UTF-8"); response.getWriter().write(result); }
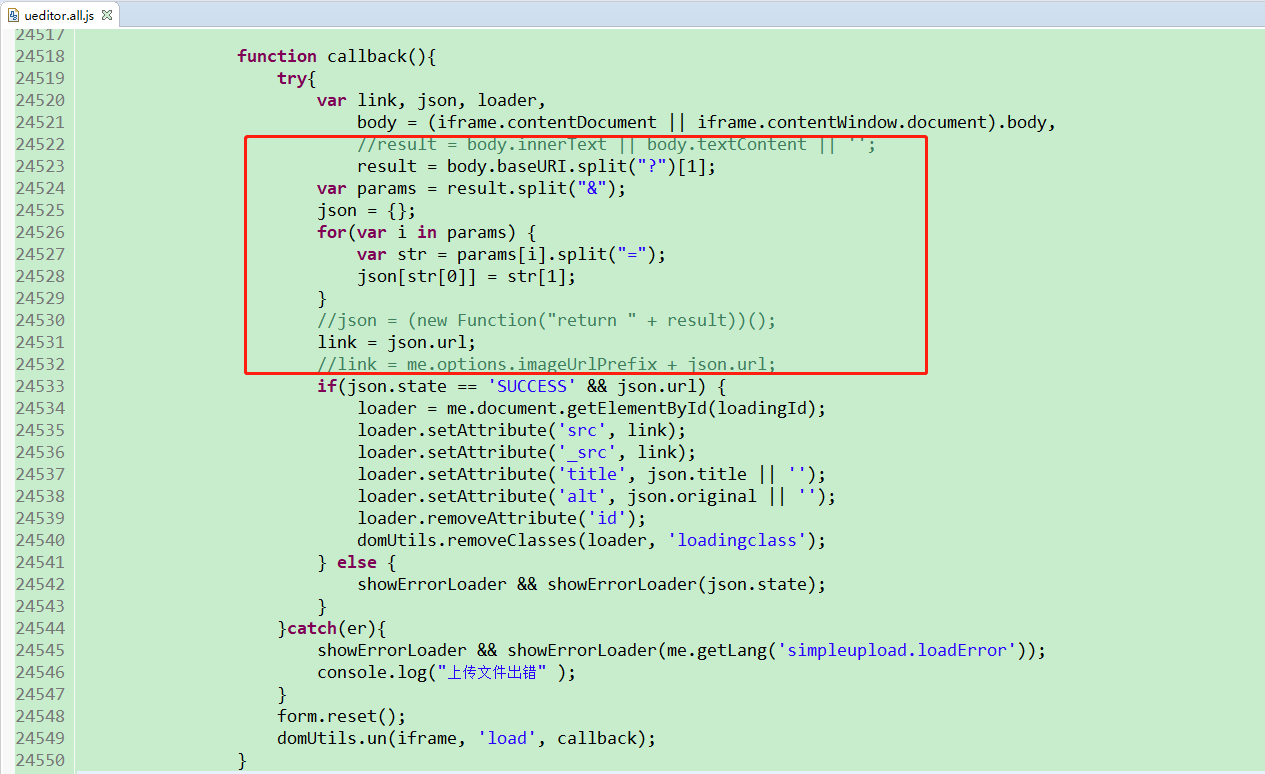
传数据给前端,暂时没有想到好的方法,我这里是用的是在请求URL后面拼接参数的方式来实现的,如果有好的方法欢迎提出。
对应的要修改ueditor.all.js里面图片上传成功的callback函数了,直接贴我写的代码吧:
大功告成,Game is over!

参考文章:
https://www.cnblogs.com/hpnet/p/6290452.htmlhttps://segmentfault.com/a/1190000013187044